 |
MRAS
Multi Rocket Avionics System
|
 |
MRAS
Multi Rocket Avionics System
|
This project is built with PlatformIO.
PlatformIO can be used with many different IDEs. See the following guide: https://platformio.org/install/integration
We recommend that you use PlatformIO for VS Code or CLion. CLion is strongly preferred as it provides many code completion and analysis features that are not available in VS Code. However, the setup process of CLion is a bit cumbersome, and there is a steeper learning curve.
There are two objectives that you must achieve when setting up the project:
pio command (installation of PIO core)Please note that we strongly recommend that you use CLion for this project. If you are a student, you can obtain a free license for CLion from JetBrains. https://www.jetbrains.com/community/education/#students
The simplest installation method is as follows:
In the background, this will install the PlatformIO core. This is the easiest way of getting it installed.
If this method doesn't work, or you want to install PlatformIO in a different way, refer to this documentation
Once you have installed PlatformIO, you need to add the PlatformIO Scripts folder to your PATH. This is so that you can use pio command from any terminal. Therefore, you will need to locate your platformio installation folder. In my case (Windows), it is located here:
C:\Users\tomto\.platformio\penv\Scripts
Install the PlatformIO plugin for CLion
Note that there are many known issues with the PlatformIO plugin for CLion, and you should refer to the linked page above regarding any issues. The setup process is quite detailed, please read the documentation carefully.
git clone https://github.com/TeamSunride/MRAS)cd MRAS)git submodule update --init --recursive)You will be greeted by this window. Close this window for now.
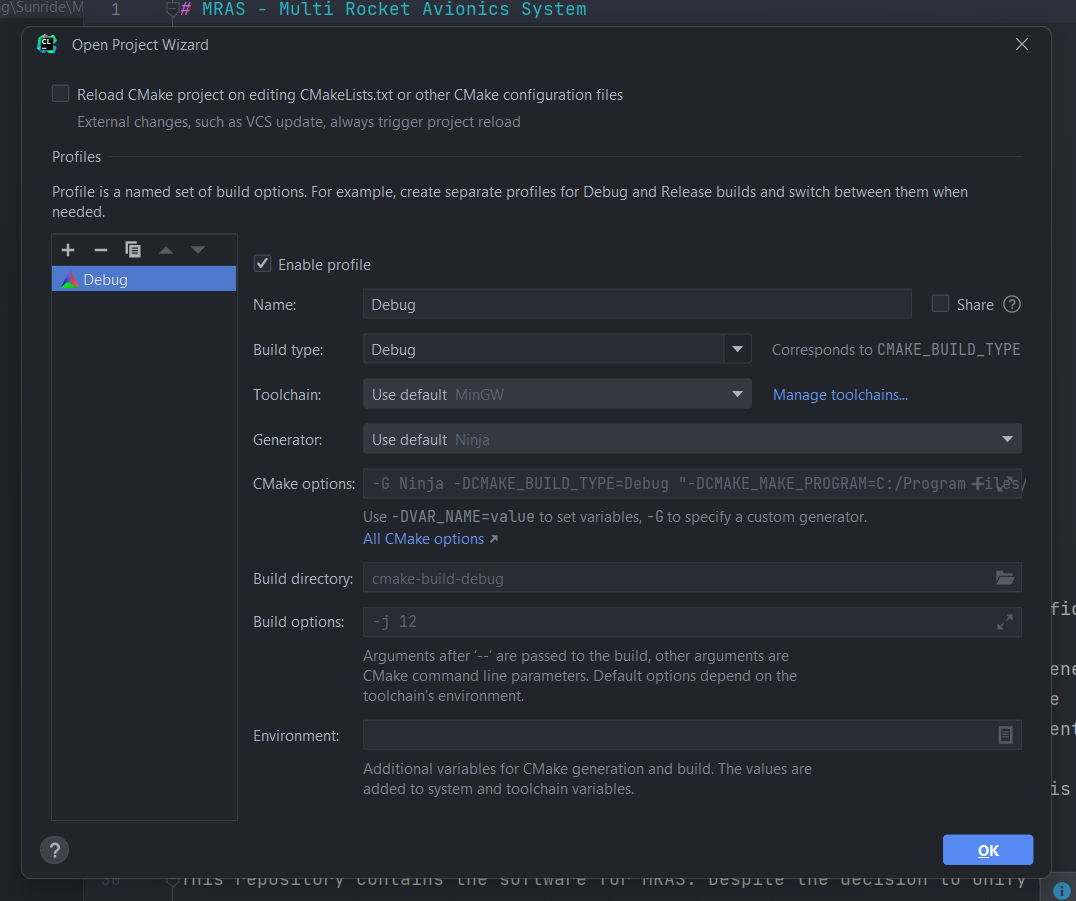
Make sure that the PlatformIO plugin is installed. You can check this by going to File -> Settings -> Plugins.
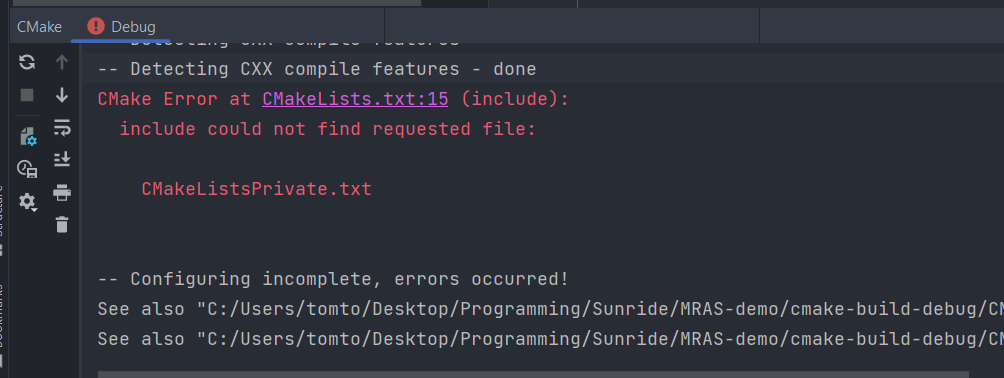
You may see this error. Ignore for now - it is fine.
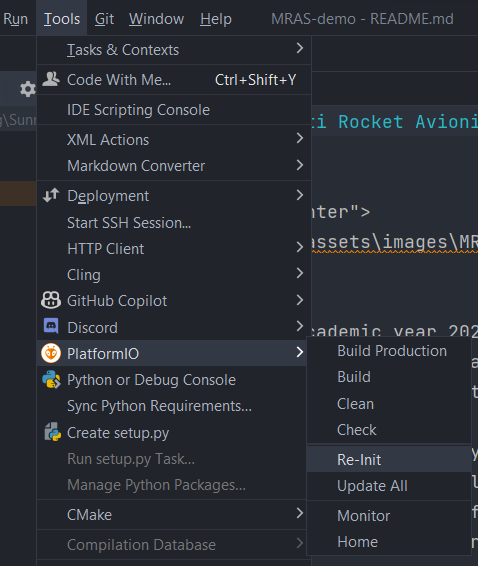
Click Tools -> PlatformIO -> Re-Init. This will initialise PlatformIO for this project.
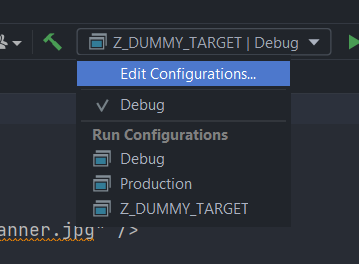
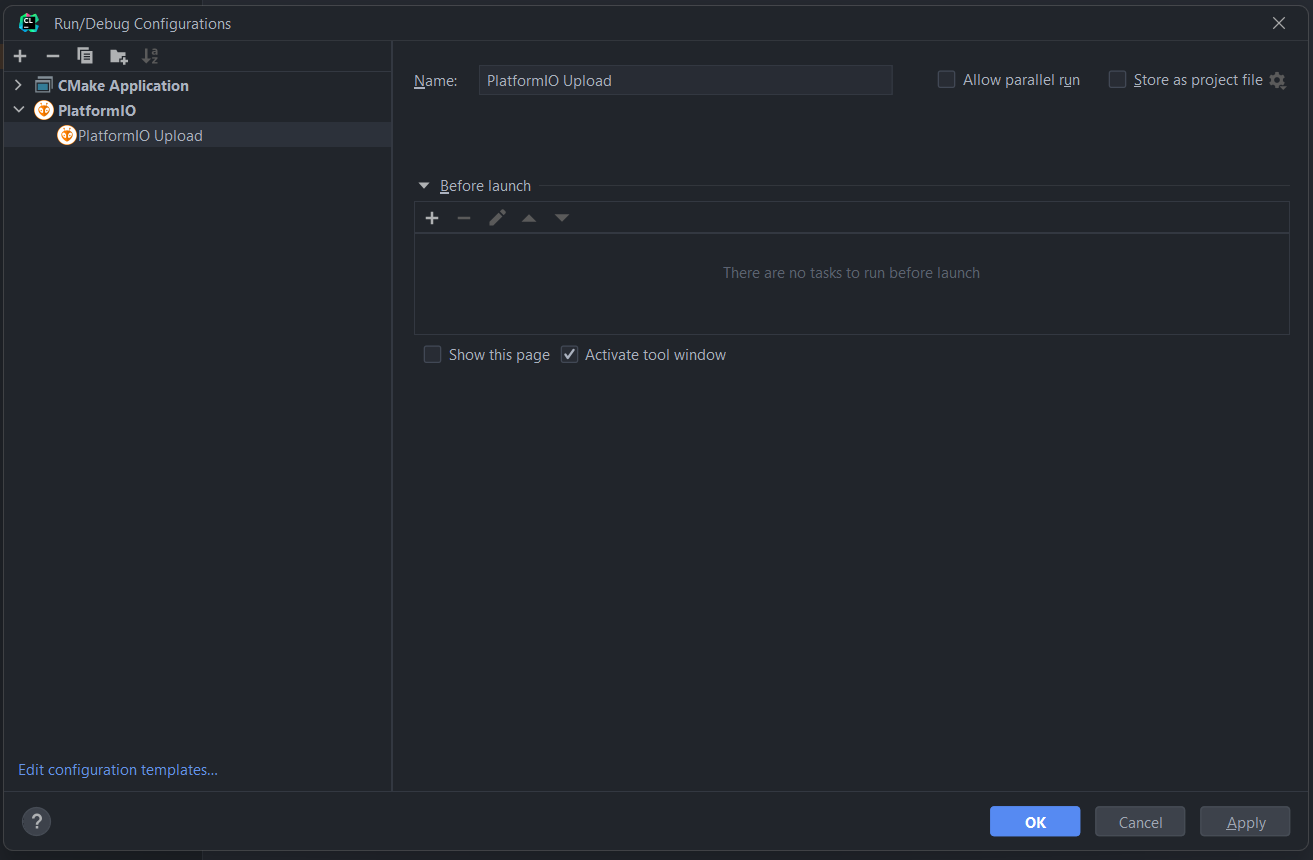
Click "edit configurations", configure a "PlatformIO Upload" configuration as shown and press "OK". Make sure to remove the "build" step before launch, as this is redundant. (See https://docs.platformio.org/en/latest/integration/ide/clion.html#build-upload)
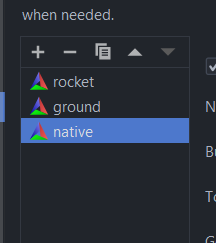
Go to File -> Settings -> Build, Execution, Deployment -> CMake. Remove the default "Debug" profile and click the + button 3 times to create the rocket, ground and native profiles.
Click "OK"
The project should now be set up. You can test that everything builds correctly by running pio run in the terminal. This will build the code for all configured environments (rocket, ground and native). You should see the following:

If you see an error here, it could be because you forgot to init all submodules after cloning the repository. Refer to the earlier steps to do this.
In order to list devices plugged into your computer, run pio device list. This will help you identify the correct COM port to use.
pio run -e rocket -t upload -t monitor
If you have more than one device plugged into your computer, you will need to specify the COM port. For example:
pio run -e rocket -t upload -t monitor -p COM3
pio run -e ground -t upload -t monitor
pio run -e native -t exec
Most source code is located in the lib folder. The src folder contains the main entry point for the project, and this is different for each environment. The test folder contains unit tests for the project.
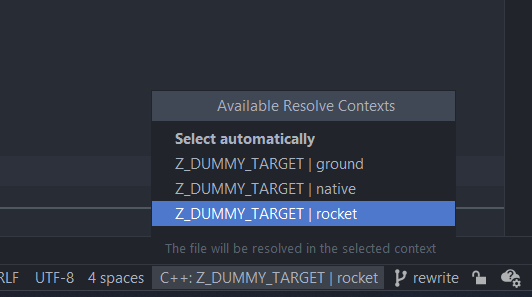
When writing code, make sure that the correct "resolve context" is being used for the current environment you are working in. See this menu at the bottom right of the screen:
